
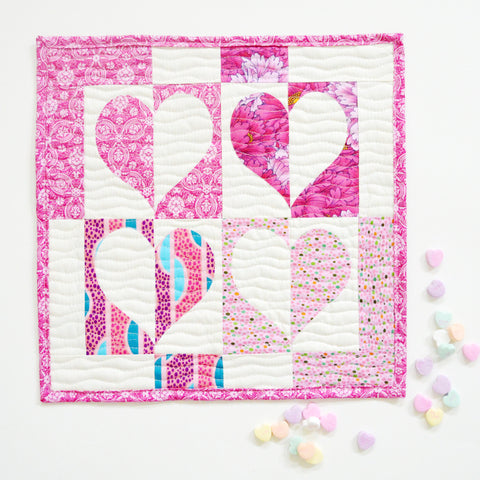
Flip Flop Heart Mini Quilt Tutorial
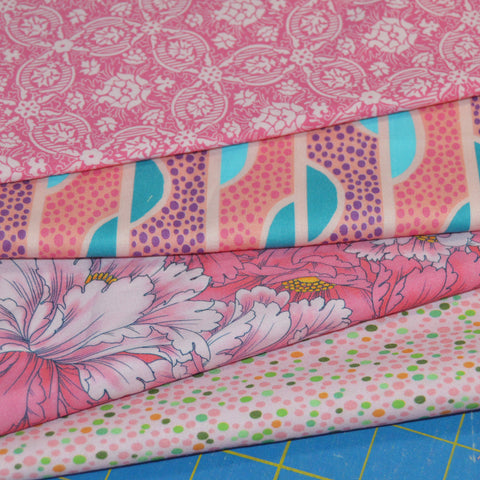
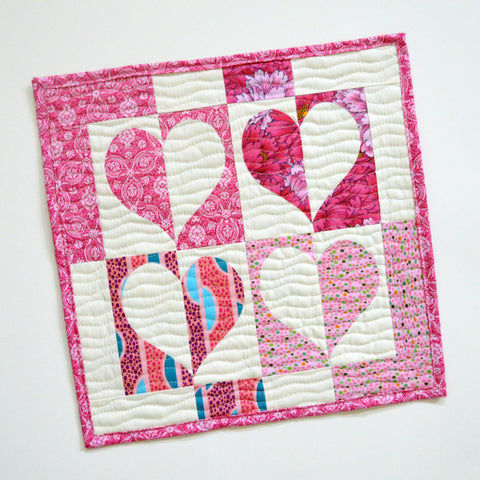
We're feeling inspired to share one more Valentine's tutorial. Our Flip Flop Heart Mini Quilt tutorial is quick and easy--fusible web does all the work! We chose four pink prints from the Dianthus collection, paired with a cream solid.
You'll Need:
Fat quarters of (5) pink Dianthus prints*
1/4 yard (or fat quarter) of Painter's Palette Solid Oyster (#121-122)
15" square of backing fabric
15" square of batting
Fusible web
*You can cut binding from one of these as well.
Cutting:
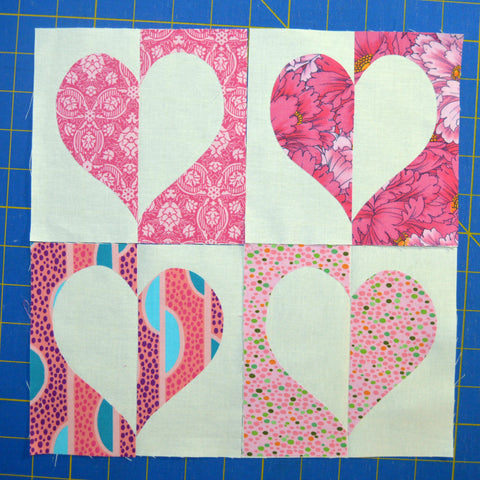
Note: The print in the upper left is print #1, lower left is print #2, lower right is print #3, and upper right is print #4.
From pink print #1:
(1) of the template shape reversed**
(1) 2" x 5-1/2" piece
(1) 2" x 4-1/2" piece
(4) 2-1/4" x 21" strips for binding
(4) 2-1/4" x 21" strips for binding
From pink print #2:
(1) of the template shape
(1) 2" x 3" piece
From pink print #3:
(1) of the template shape
(1) 2" x 5-1/2" piece
(1) 2" x 4-1/2" piece
From pink print #4:
(1) of the template shape
(1) 2" x 3" piece
From the Oyster solid:
(4) 5-1/2" squares
(2) 2" x 3" pieces
(2) 2" x 4-1/2" pieces
(2) 2" x 5-1/2" pieces
**See steps 1 and 2 for directions on using the template.
Make the Mini Quilt:
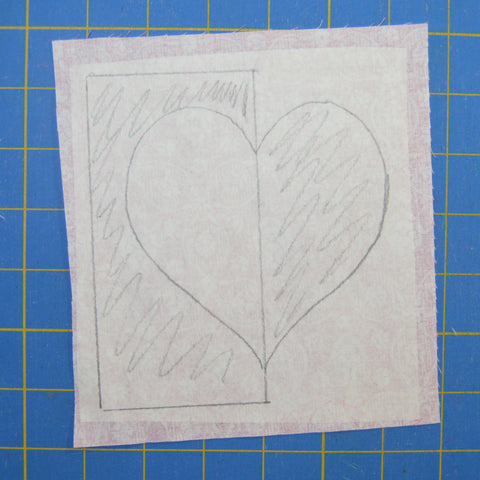
Step 1 Trace the gray outlined section (including the seam allowance on the gray section) onto the paper side of fusible web.
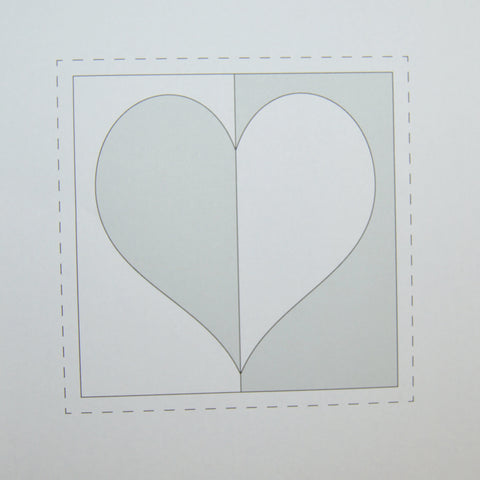
Step 2 Fuse onto the wrong side of pink print #2. Note how we've lightly shaded in the fusible web as a reminder about which sections we'll be cutting out.
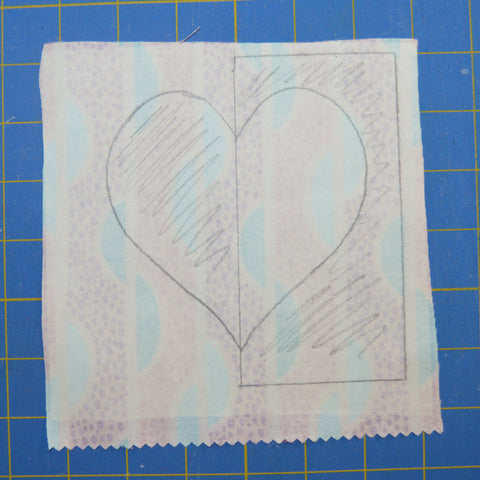
Step 3 Cut out the shaded sections, making sure you include the seam allowance on the shaded side. You'll be fusing these onto (1) 5-1/2" Oyster solid square. Fold the Oyster solid square in half and press to mark the center line.
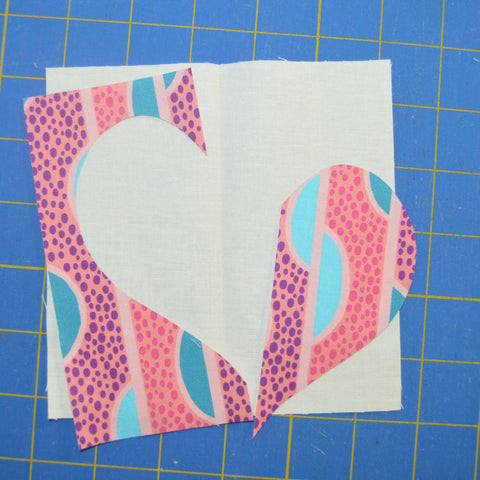
Step 4 Position and fuse the left piece (heart outline) first. The raw edges should align with the raw edges of the Oyster square. Fuse in place. Position the half heart shape along the center fold and fuse in place.
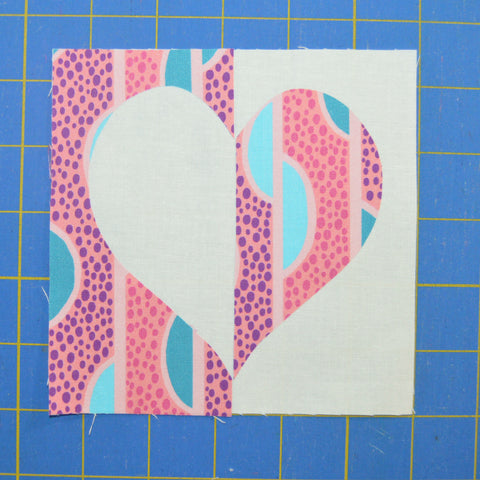
Step 5 Repeat to make a second block using pink print #3.
Step 6 To make the reverse blocks, trace the template onto the paper side of fusible web, but this time we'll be using the white sections instead of the gray sections (they're lightly shaded below). Fuse onto pink print #1.
Step 7 Cut out and apply to (1) 5-1/2" Oyster solid square as in step 4.
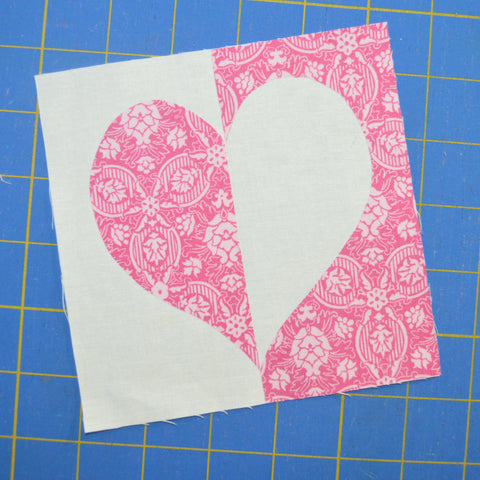
Step 8 Make a second reverse block using pink print #4.
Step 9 Lay out the blocks into (2) rows of (2) blocks each, making sure your prints and cream sections alternate.
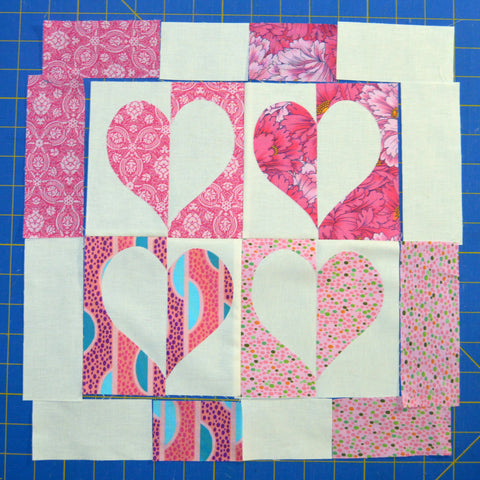
Step 10 Lay out the border pieces as shown; the 2" x 5-1/2" pieces should be on the sides and the shorter pieces on the top and bottom.
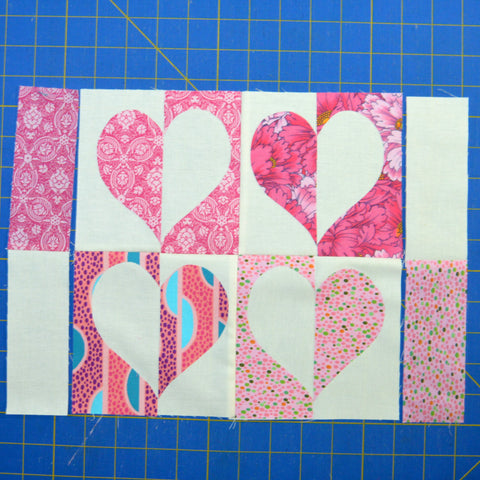
Step 11 Sew (1) 2" x 5-1/2" pink print #1 piece to (1) 2" x 5-1/2" Oyster solid piece to make a left side border. Repeat using the pink print #3 piece to make the right side border. Sew the borders to the sides of the quilt center.
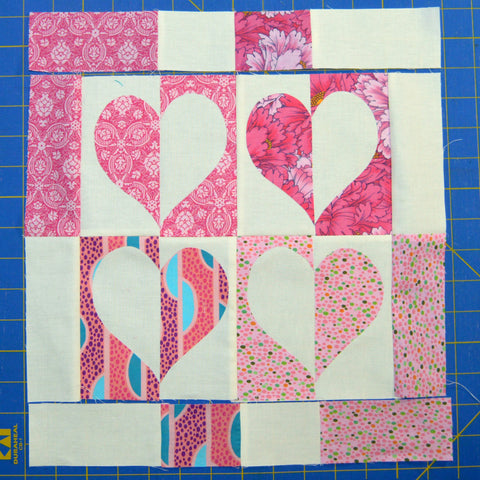
Step 12 To make the top border, sew together (1) 2" x 4-1/2" pink print #1 piece, (1) 2" x 3" Oyster solid piece, (1) 2" x 3" pink print #4 piece, and (1) 2" x 4-1/2" Oyster solid piece. To make the bottom border, sew together (1) 2" x 4-1/2" Oyster solid piece, (1) 2" x 3" pink print #2 piece, (1) 2" x 3" Oyster solid piece, and (1) 2" x 4-1/2" pink print #4 piece. Sew the top and bottom borders to the quilt center.
Step 13 Layer the backing right side down, batting and quilt top right side up. Baste the layers and quilt as desired. Use the (4) 2-1/4" x 21" strips to bind the quilt.
Enjoy!
Don't miss our other heart-themed tutorials!